
A great way to view and understand your building or repair project before you get started. Find out just about everything you need to know by watching the video below.
Cracks or breaks in concrete or masonry basement walls can turn into active water leaks. Repair leaks and prevent costly damage with the help of QUIKRETE Hydraulic Water-Stop.
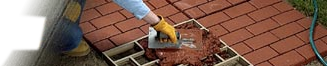
When working with cement-based products, always wear eye protection and waterproof gloves.
Step 1
Using a masonry chisel, enlarge the crack to a minimum ¾-inch width and then remove all loose material.
Step 2
Squarely cut or undercut the edges of the crack. It is important not to create “v” shaped edges as the Hydraulic Water-Stop expands as it hardens.
Step 3
Mix Hydraulic Water-Stop by adding about 4 to 4 1/2 parts Water-Stop cement to 1 part clean water.
Step 4
Use a margin trowel to thoroughly mix the material to a heavy putty consistency, making sure that the mix is uniform and lump free. If the mix is too wet, add additional Water-Stop cement and mix thoroughly; if the mix is too dry, add small amounts of water sparingly.
NOTE: Hydraulic Water-Stop sets extremely fast, so do not mix any more material than can be used in 2-3 minutes.
Step 5
Once a putty consistency is achieved, take a handful of Water-Stop in your gloved hand and begin to work the material into a ball.
Step 6
Press the Water-Stop cement into the crack using heavy pressure and hold in place for several seconds.
Step 7
After the material has become “thumbprint” hard, use a margin trowel to trim the patch to match the contour of the surrounding surface.
Step 8
The Water-Stop repair can be painted after 7 days with a water-based latex paint.